Why build a website from scratch?

Learning how to build a website from scratch is like building your own house – you decide where everything goes and how it functions – unlike when you rent space on a website builder platform where you don’t have the same level of customization
Creators who want a portfolio, small cafés looking to stand out, or bloggers chasing independence often create a website from scratch instead of using a pre-made mold. A beginner summed it up on Reddit: “I want to start a website from scratch and just build it in VS Code. Do I have to use a CMS? Everything online is telling me to use WordPress, but I can’t customize anything without paying.”
Starting a website from scratch also helps you spot and address issues that would otherwise cause headaches later. You also don't have to face platform limitations, fees, or sudden changes that would disrupt your business plan. Even if you switch to a website builder later, grasping the basics gives you more control and a better SEO foundation.
Step 1 – planning your website
Everything begins with a clear plan. Clarify the purpose of your site and your target audience. You can write this down as: “What I’ve tried so far” and “My end goal.” No matter what you’re going for – informational blog or portfolio, interactive bookings, store, or memberships – this clarity will guide your following choices.
Draft your site structure before designing, like house foundations. Use convenient approaches like a simple flowchart, a mind map, or an online planner to draw core pages – Home, About, Contact, and Blog. Do the same for any feature pages – Store, Services, Booking, FAQs.
Think about what the main action is that a visitor takes on a specific page – a call-to-action like booking a service, or taking advantage of a discount – and design the menu so people can get there in one or two clicks. Finally, don’t forget your domain name. Ideally, a .com address with a short and easy-to-spell name builds trust and is memorable.
Step 2 – choosing the right website builder or platform
After completing step one, decide how to build. You have three options: website builders, a content management system (CMS) like WordPress, or hand-coding with HTML/CSS. Each path has different advantages depending on your skills, time, and budget.
For the fastest route, go with a website builder. Squarespace is a popular tool with simple drag-and-drop elements so you don’t have to code. As the company promises: “Squarespace is designed so users don’t need any coding experience to build a beautiful website.” That promise is appealing when you’re just starting out or need a professional-looking site quickly. Alternatives like Wix and Hostinger are also popular beginner-friendly options.
WordPress is a very popular CMS – not a builder. It’s free to install, and has a ton of plugins that expand into almost any kind of site – from blogs to ecommerce. On the other hand, only advanced users with coding knowledge can extract its full potential.
Finally, you can go the pure manual route if you know how to code with HTML and CSS. This obviously requires technical skills and a lot of time, but eliminates platform limitations entirely. Developers and businesses that need very specific designs often choose this path.
Remember, website builders are convenient but require payment in the form of monthly fees to fully access features. Coding is the professional way, but the real expense is your time and technical skills.
Step 3 – designing your website
Now that you’ve chosen a method, you can head into design. Most beginners use templates, because they give you a professional structure quickly without any coding on your end.
Squarespace, for example, has dozens of customizable templates across categories like portfolio, cafés, and online stores. Through Squarespace’s drag-and-drop tools, you can tweak fonts, colors, and layouts – as the company states: “Design a website using our industry-leading website templates, designer fonts, and color palettes.” You can also access hundreds of stock photos and built-in design assets to speed up the process.

Good website design balances usability and aesthetics. Your website must load quickly, have clear navigation, and – most importantly – be mobile-friendly. Make sure to test your site on different screen sizes and devices – Windows, macOS, Android, and iOS – so visitors can book, browse, or buy smoothly and uniformly.
Brand identity is crucial, so pick a color scheme that aligns with your tone. Choose typography that stays easily legible on both desktop and phone. For inspiration and ideas, you can go to competitors’ websites, but try to retain your own brand identity.
Before moving on to the next step, check the basics: place your logo where visitors expect it, keep calls-to-action clear, and compress heavy images or animation so that pages load fast.
Step 4 – adding content and essential pages
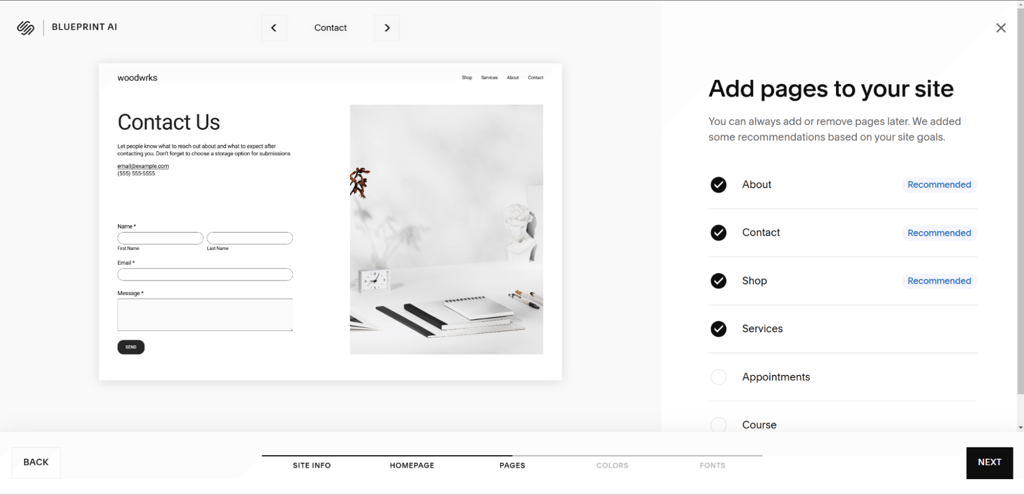
Once you’ve handled design, it’s time for essential core pages. At a minimum, this includes: a homepage, an about page, a services or products page, and a contact page. If you’ll share updates or insights – a blog page.
Builders like Squarespace make this easy for beginners with unlimited content blocks and easy content editing. Instead of stressing about formatting, you can focus on writing brand-aligned text that brings out your brand.
Let’s not forget SEO, because good content is tied to it. Bad SEO can block your growth, so start small. For instance, write concise homepage messaging that tells your visitors who you are and what you provide in a single line – like “Artisan coffee delivered daily to your neighborhood” rather than vague slogans.
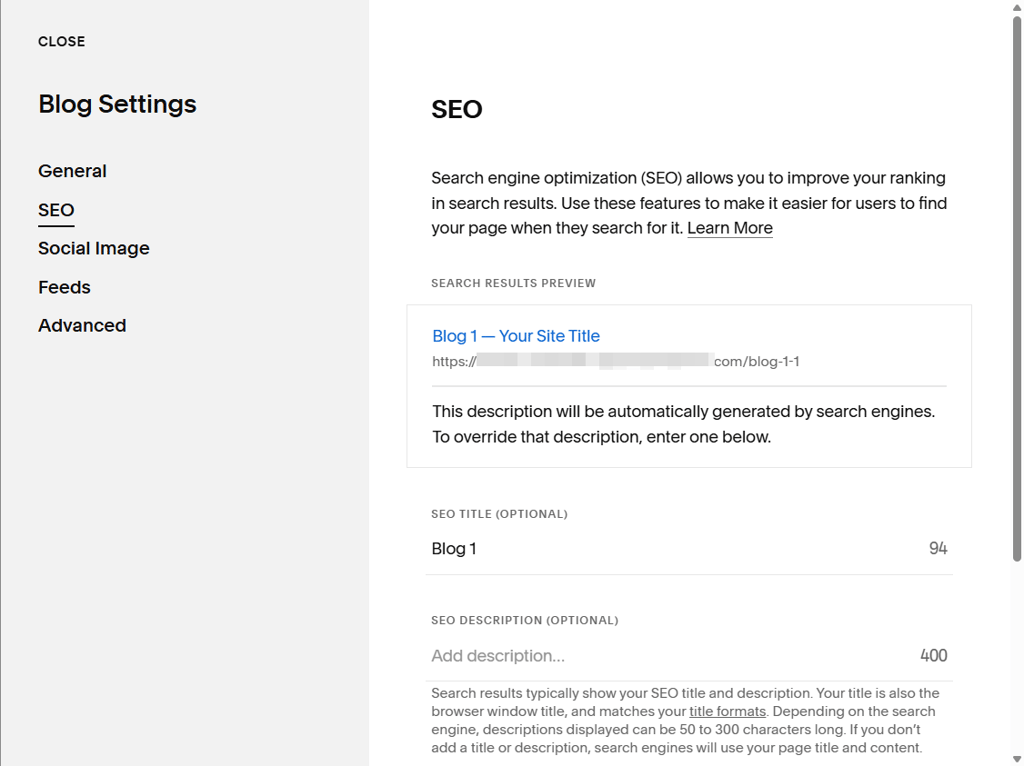
Finally, write descriptive meta titles and descriptions, keep paragraphs brief, aim for readable sections, and add alt text to your images. Over time, expand your content with FAQs, portfolio items, or case studies to keep your site both useful and scannable.
Step 5 – publishing and promoting your website
It’s time to go live. If you made your site with WordPress or custom code, connect to reliable hosting first. Register a domain and create a backup. Web builders like Squarespace publish in just a few minutes since hosting, domain registration, and design tools are bundled.
Next, run checks on your buttons and internal links, whether contact or signup works, and check for any broken links. If you’re hand-coding, verify your robots.txt and indexing settings so search engines can crawl the site.
Don’t forget legal requirements and security: implement a privacy policy and cookie consent, and verify SSL (Secure Sockets Layer: the padlock in the address bar). Finally, set up analytics tools like Google Analytics and Search Console early on so you can track results.
Keep SEO in mind from this point. Several providers have step-by-step improvement plans for traffic and rankings that you can follow closely.
Here’s a quick launch checklist:
- Connect and verify your domain
- Activate hosting, SSL, and site backup
- Pre-launch site testing
- Set up analytics
- Publish
- Submit XML sitemap to search engines
- Announce the launch on social media/email
- Begin tracking with analytics
Squarespace promo – launch your site with ease
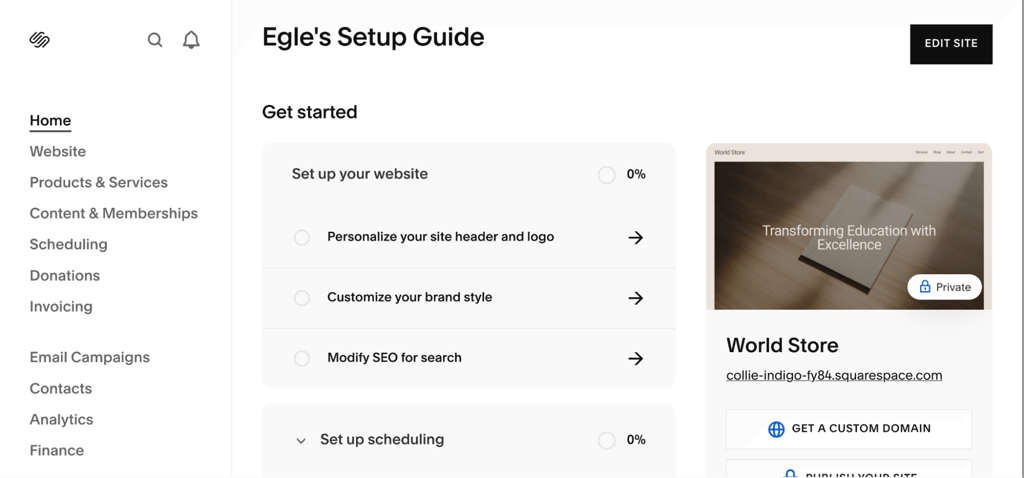
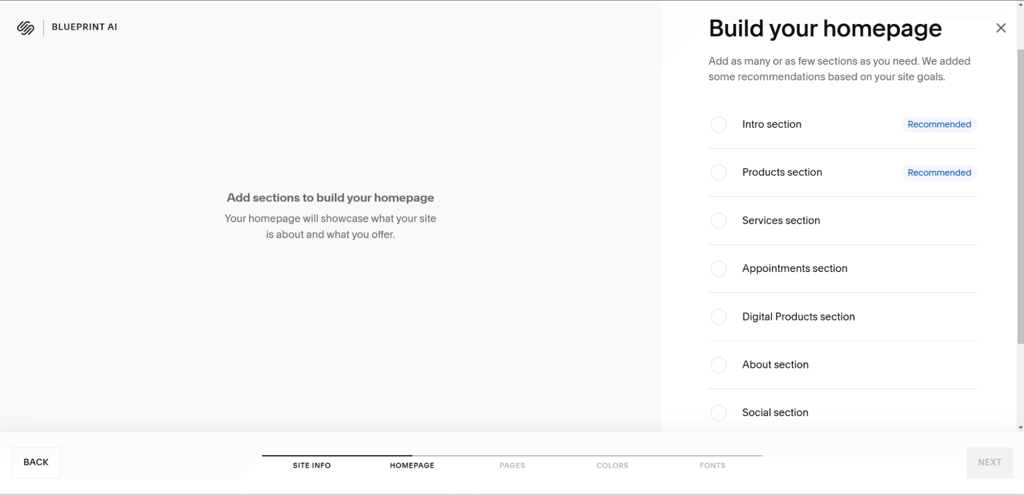
Squarespace is a beginner-friendly website builder with a drag-and-drop editor that makes arranging text, images, and pages easy, beautiful, and inspirational. It also has a library of ready-made, customizable templates to give you a great head start. You can also use Squarespace’s impressive Blueprint AI to generate a consistent, personalized template and brand look.
What’s great about Squarespace is that it’s an all-in-one ecosystem, which means that hosting, domain registration, design tools, and even ecommerce features are there at your disposal. You can launch in minutes without multi-tasking services. On top of that, built-in SEO tools and marketing features – like email campaigns and social – help you grow your site traffic hassle-free as soon as you go live.
Squarespace also has 24/7 customer support, plus tutorials and webinars. Start Now with a free 14-day Squarespace trial (no credit card required) to see how quickly you can publish a professional site.
Common mistakes to avoid when building your first website
Beginner websites fail because of a few common mistakes, like forgetting initial SEO setup. Make sure your meta descriptions and keywords are relevant, and give your content structure with headings and alt tags, or search engines will struggle to rank your pages.
Ignoring mobile compatibility is another common mistake. Most people browse via mobile phone today, so ensure your layout doesn’t break on small screens. Avoid heavy animations, long menus, and uncompressed images that slow pages down.
User testing is another key area that’s often ignored. Test your site yourself, then have a fresh pair of eyes – like a friend – complete a form or navigate between pages to reveal usability problems before your site goes public.
Security and legality are another common issue. To fix that, activate/verify SSL, keep site backups, and add a privacy policy and cookie consent.
Remember, your site content must speak to your target audience and guide them effectively while addressing their needs.
How to learn more – top resources for website building
Resources are always important, no matter what stage of website building you’re at. After all, the best creators don’t stop learning.
As a beginner, start with structured tutorials offered within the website builder you use. For example, Squarespace has webinars and step-by-step guides, while WordPress has large community forums and documentation. Try the Squarespace Help Center and WordPress.org documentation.
If you’re interested in starting from scratch (coding) without the help of a web builder, look for beginner courses on HTML, CSS, and JavaScript that walk you through practical projects. You can also ask questions via forums and user groups. Check out freeCodeCamp or W3Schools for free resources. Scrimba is a great interactive option.
When you want to sharpen up your design and content skills, look for guides on branding, typography, and SEO optimization. Ongoing training modules are great for staying consistent, as are trusted YouTube channels like DesignCourse.
Troubleshooting – what to do if you get stuck
We can all get stuck when building a website. However, beginners will run into common issues like template errors, publishing glitches, or problems connecting your domain. Nothing to worry about, this is normal..
Simply start with some quick checks like refreshing your browser, clearing your cache, and verifying that your domain is correctly pointed to your hosting. If pages don’t load, try a different template or a different browser. For publishing delays, check if SSL and hosting are active.
Thankfully, most website builders like Squarespace have detailed Help Centers, FAQs, and user forums where you’ll find others who faced the same issue. And if you’re still stuck, try the customer support – you’ll often find chatbots (with live agents) to talk to in today’s website builder services.
Troubleshooting isn’t anything to be ashamed about, even the most advanced users need assistance. Each fix makes you more confident, while support is always there if you need it.
FAQ
What skills do I need to build a website from scratch?
You must know basic design principles, writing clear content, and how site navigation works. If you’re coding, you need HTML, CSS coding knowledge at the minimum (JavaScript is increasingly required). Take a course on user experience (UX) principles. Website builders like Squarespace are much easier to use since there’s far less technical knowledge required.
How long does it take to create a website from scratch?
That depends, but with a builder like Squarespace, you can publish a basic site in a day. Coding manually or setting up a CMS environment like WordPress might take weeks – depending on content and complexity.
Do I need to code to build a website?
No, modern website builders do all of the work. However, you’ll be limited to the platform’s templates. Complete control and creativity comes with having the technical skills to build a website from scratch.
What is the best website builder for beginners?
Squarespace is a great choice thanks to its drag-and-drop editor, templates, hosting, and SEO tools – all together in one place. However, alternatives like Wix and Hostinger are also beginner-friendly.
How do I get my website to rank higher on Google?
Google likes SEO basics: use descriptive page titles, meta descriptions, and well-researched keywords. Write high-quality human content that directly answers people’s questions. Optimize your images with alt tags, and prioritize fast site speed. Fix broken links. Make sure your site runs smoothly and without error on mobile devices. Publish new content consistently and update outdated information.